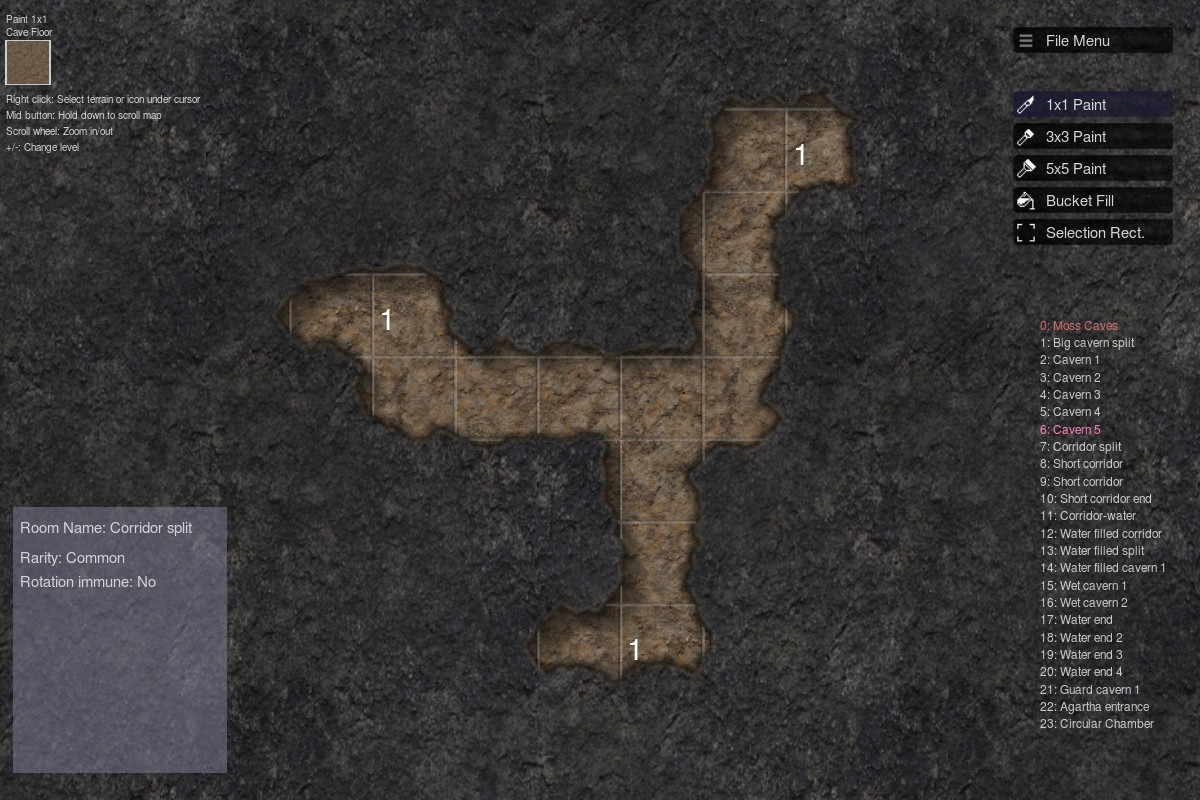
Illwinter’s Floorplan Generator or IFG for short, is both a tool to create random dungeons and to draw battle maps with squares or hexes for role playing games. This manual will mostly explain the manual creation of floorplans, so press “Floorplan Editor” in the main menu to get started.
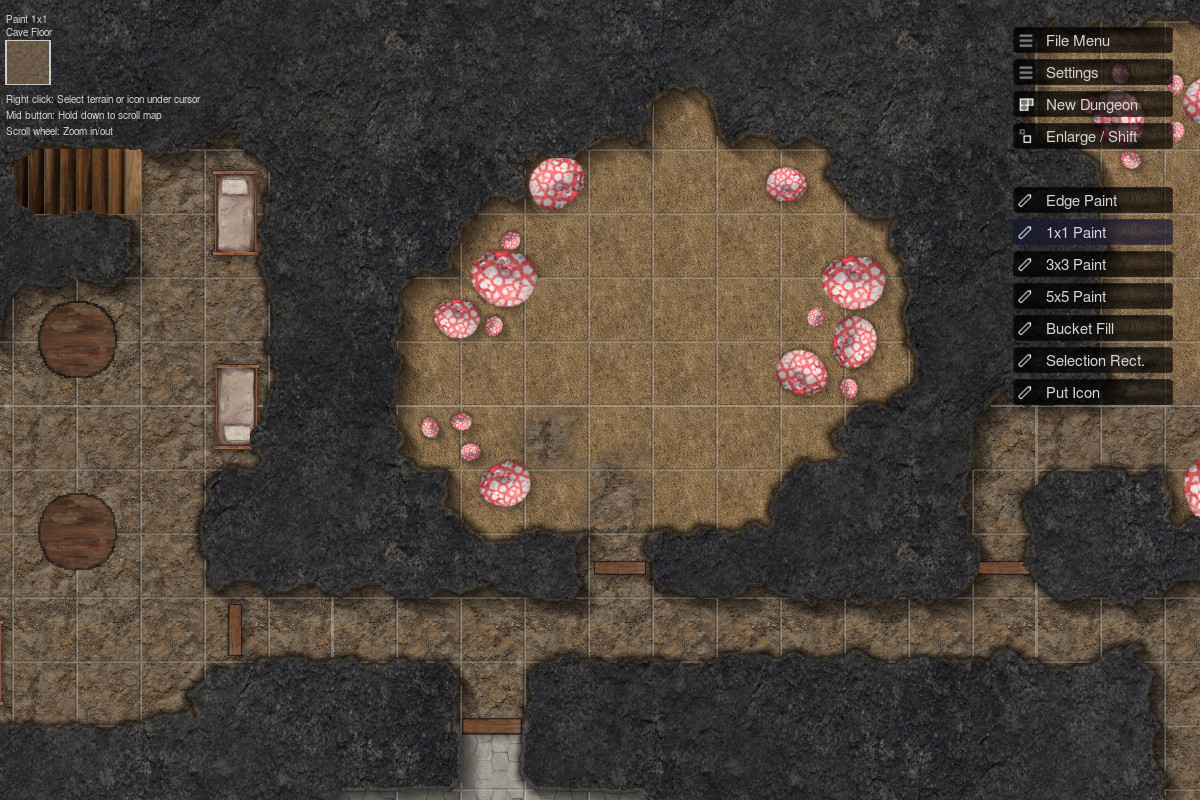
The main part of creating a floorplan will be to determine the correct terrain for all squares. It’s quite simple, you click on a square to paint it with the currently selected terrain type. To change terrain type you can either right click on a square to pick up that terrain or you can press ‘t’ to select terrain from a menu.
The easiest way to scroll the map so you can paint it all is to hold down the middle mouse button (or the scroll wheel). Another way is to use the arrow keys.
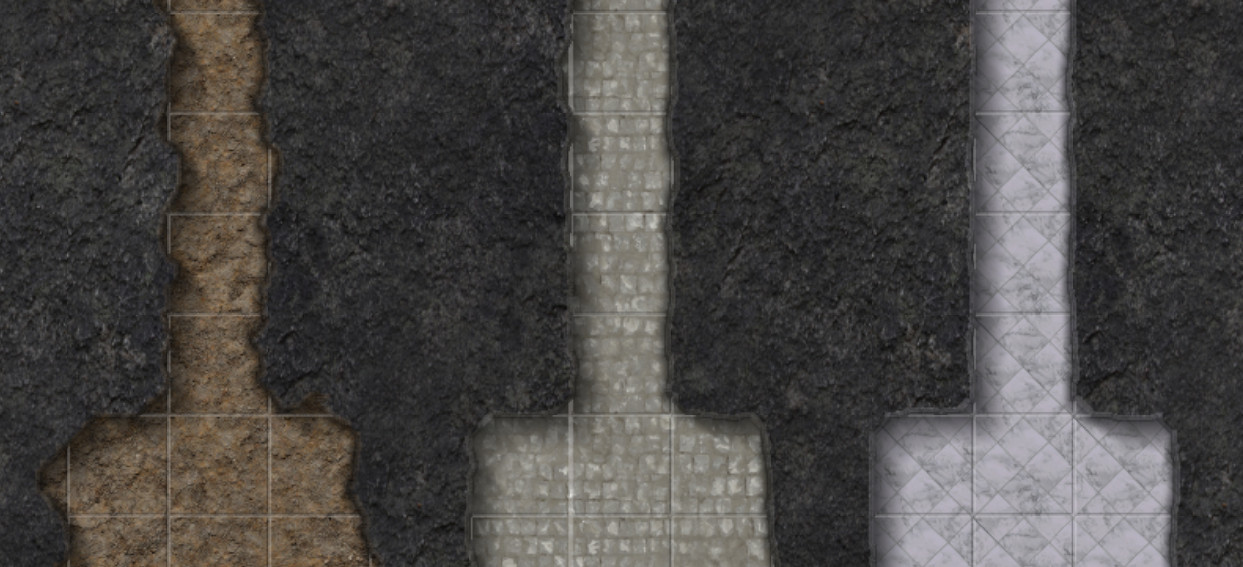
Whenever a rugged wall like a cave wall is adjacent to a natural terrain like a cave floor the wall will become jagged. If we use a man made wall or a smooth marble floor instead, the edge will be straight and smooth. Fractals are used automatically to create the transitions between terrain, you can press ‘l’ to rerandomize the fractals and thus alter the random part of the dungeon.
It is also possible to cut off square corners to create diagonal walls or just less square corners. By pressing ‘v’ on a square that square will be turned into a cut off square. The cut off attribute can be removed by pressing ‘v’ again.
Edge painting is useful when you want narrow walls between squares. Press ‘0’ to switch to edge painting mode, ‘1’ - ‘5’ will switch back to normal painting mode with differently sized brushes.
To remove painted edges you press ‘d’ while holding the mouse curse above the edge you want to remove.
d        delete edge under cursor
e        edge painting
t        select terrain
G        show/hide grid
i        select icon
ctrl-i   search for icon
v        cut off corner
shift+b  bucket fill
0-5      brush size (0=edge paint)
ctrl+e   toggle 'wall light'
ctrl+l   load floorplan
ctrl+n   new floorplan
ctrl+p   export/print menu
ctrl+s   save floorplan
ctrl+w   toggle 'white walls'
ctrl+y   redo
ctrl+z   undo
alt+b    summon bush
alt+d    summon door
alt+t    summon tree
F11      hide/show interface
delete   delete icon under cursor
There are many keyboard shortcuts to speed up things. The most important ones are listed in the table above. You can press ‘?’ in the map editor to see them all.
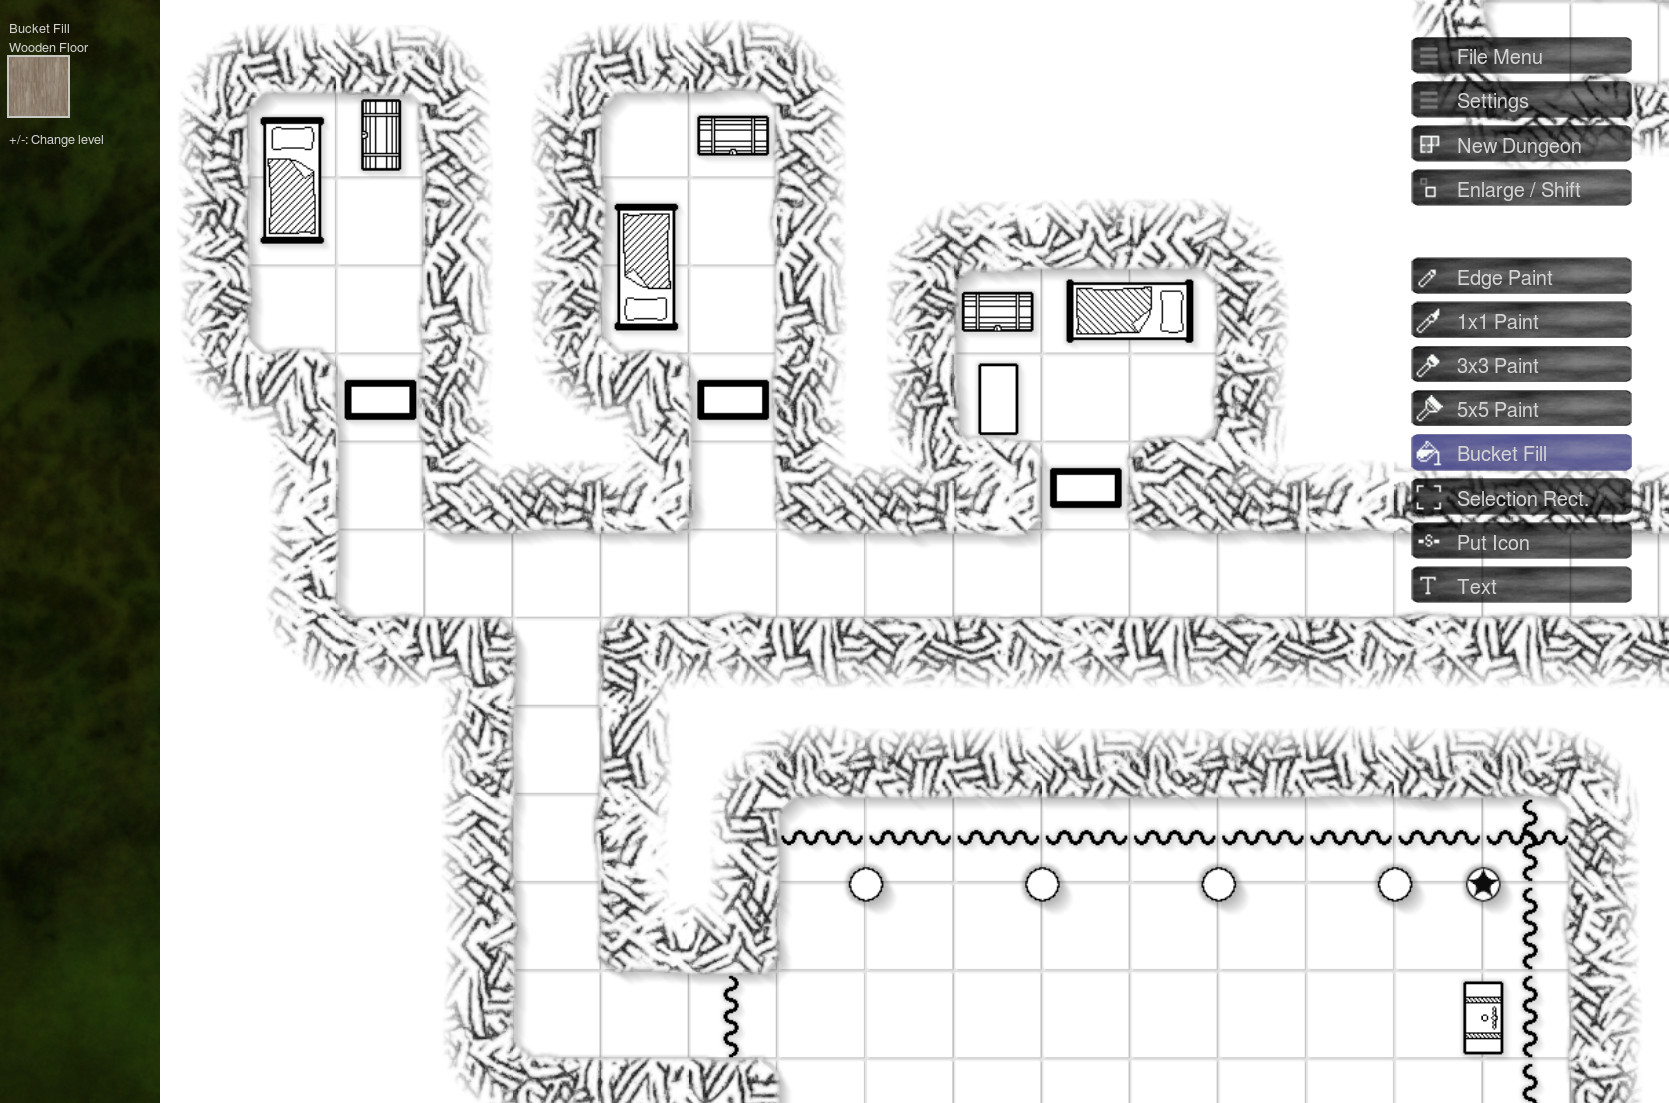
When the terrain is completed you might want to place some icons on the map to represent furniture, doors, trees and other objects. To select an icon press ‘i’ and click on one of the icons (or ctrl-i if you want to search by typing). Most icons will be placed under walls by default, so you will have to click on a floor part of the map to place an icon in a visible spot.
There are many ways to modify an icon before placing it, read all the options on the left part of the screen when you have an icon selected. The most important shortcut is probably ‘x’ that will rotate the icon 90 degrees.
To remove an icon, hold the mouse over it and press ‘Delete’. By holding down Ctrl and right clicking on an icon, you will pick it up so it can be moved or modified in other ways.
Press ctrl+o to open the settings menu, from which you can set up the desired light effects. Shadows default to dungeon shadows, this means that shadows are created in all directions which gives a suitable appearance for cave dungeons and similar settings. Outdoor shadows have the light from a single direction and walls and objects will only cast shadow in a single direction.
The Shadows Strength setting can be changed if you want the shadows to be more or less prominent, the default value is 65.
The wall light option adds some light to the walls that are close to ground tiles. You can toggle this option by pressing ctrl+e in the editor.
There is also an option to draw all walls as white that can be toggled by pressing ctrl+w in the editor. This is a printer ink saving feature that will turn all thick walls white, because they are unlikely to be part of the play area anyway.
Another way to save printer ink is to make a black & white style dungeon. You can press ctrl+j in the editor to automatically turn the dungeon into a black and white one. Usually you want to combine this with turning the walls white (ctrl+w) and maybe replacing the color icons with black and white icons.
When the dungeon is complete you will probably want to export it, either to a pdf or to an image file. Press ctrl+p to export the image and choose if you want it to go to your pdf reader or your paint program. Use the pdf-reader to print it and the paint program to save it as a file. You can also use the paint program to add in finishing touches before saving it or reimporting it and then creating a pdf with the modified dungeon.
It is possible to import a dungeon layout from a simple text file (ASCII) where one character represents one square in the dungeon. This could be helpful for people developing their own dungeon creating scripts or when converting a dungeon from some other format.
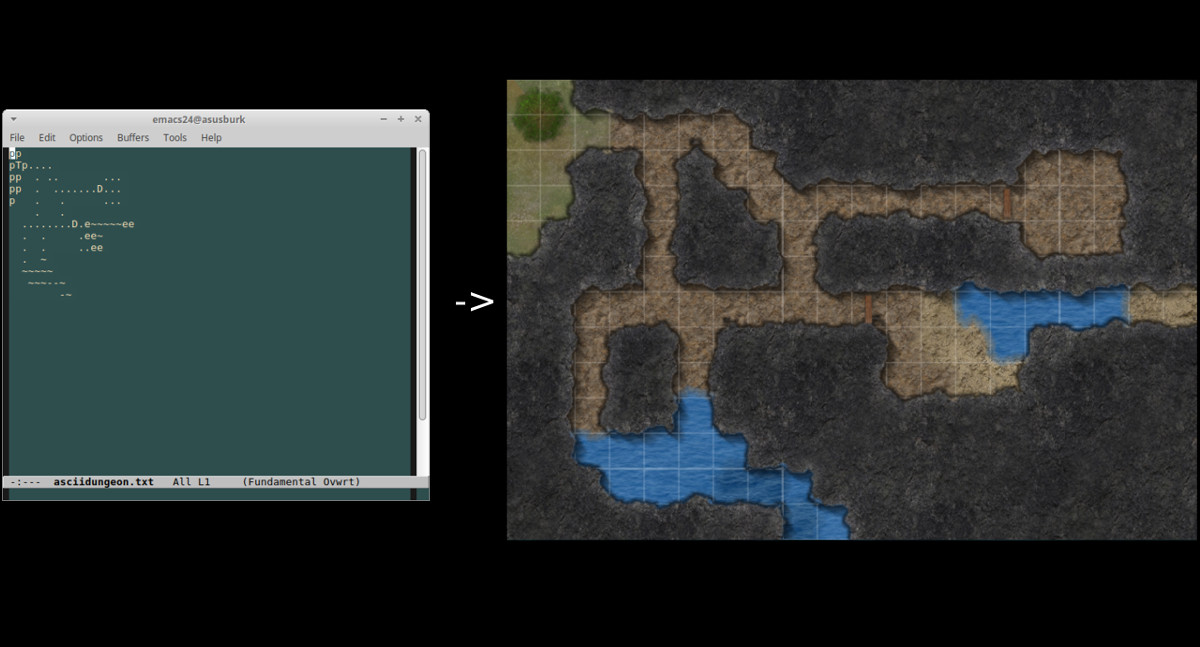
To import a dungeon from a text file, go to the File Menu and click on Import ASCII Dungeon. Another way to do this that is suitable for scripting, is to call IFG with the following start option:
--importascii=mydungeon.txtThe following table shows which text character corresponds to which terrain type or icon. If an icon is selected instead of a terrain, then IFG will guess what terrain would be suitable in that square depending on the surrounding terrain.
p      Plains
y      Shadeland
v      Savanna
d      Desert
w      Wasteland
a      Ash
s      Snow
~      Water
-      Deep Water
^      Black Sea
r      River
=      Frozen Water
#      Cave Wall
l      Lava
.      Cave Floor
M      Marble Floor
C      Chess Floor
c      Clouds
f      Flames
!      Void
S      Sewer
U      Murky Water
W      Stone Wall
f      Wooden Floor
e      Earth
O      Wood Wall
R      Air
l      Cliff
F      Fields
_      White
1      Wall
2      Cave Wall
3      Water
4      Fire
g      Dark Grass
b      Blank
5      Dotted Area
6      Striped Area
7      Debris
L      Cobblestones
H      Hexfloor
m      Muddy Snow
k      Wall
K      Floor
8      Wall
9      Floor
0      White Wall
G      Granite Floor
:      Stone Floor
space  Cave Wall
D      Door
B      Bush
T Tree It is possible to create your own icons and terrain squares by creating a PNG image and saving it in the correct location. See the following chapters for details.
It is possible to import your own icons into IFG. To do so open “File Menu / Import New Icons”. Here you can click on “Open User Icons Directory” to open a file browser showing directories that you can place new icons in.
If you want to create new categories for your icons, you can create new directories here and put the icons in those instead.
Usually putting the image file in one of the directories is all that is needed. An icon that should take up one square should be 64x64 pixels large. A 128x64 large icon would be 2 squares wide. Icons can have any size an cover fractions of squares.
The file format of the image must be TGA (24- or 32-bit, uncompressed or RLE) or PNG (not interlaced and not indexed colors).
It is also possible to give icons special attributes by giving them a special ending to the filename. This ending should be two underscores (_) followed by one or more attributes. See the following table for the attributes available. E.g. mynewstatue__h.png would be a new icon that casts long shadows.
l    low, casts no shadows
h    high, casts longer shadows
d    door, drawn on top of walls
c carpet, drawn below grid and other items It is possible to import your own terrain types into IFG. To do so open “File Menu / Import New Terrains”. Here you can click on “Open User Terrain Directory” to open a file browser showing directories that you can place new terrain images in.
If you want to create new categories for your terrains, you can create new directories here and put the icons in those instead. The new terrain must be placed in a subdirectory though, if placed directly in the “terrain” directory it will not work.
Usually putting the image file in one of the directories is all that is needed. A terrain image should be 64x64, 128x128, 256x256 or 512x512 pixels large. The image should probably be seamless as well, or you’ll be able to see where it repeats itself. The size of one square is 64x64 pixels.
The file format of the image must be TGA (24- or 32-bit, uncompressed or RLE) or PNG.
It is also possible to give terrains special attributes by giving them a special ending to the filename. This ending should be two underscores (_) followed by one or more attributes. See the following table for the attributes available. E.g. goldwall__w35.png would be a new terrain that is a very straight wall with very little fuzziness.
w    wall
1    straightness 1 (default)
2    straightness 2
3    straightness 3
4    straightness 4 (completely straight)
5    fuzziness 1
6    fuzziness 2 (default)
7    fuzziness 3
8    fuzziness 4
b    black border
s    never shaded
S    don't cast shadows
n    reduced wall shade
Straightness determines how jagged the terrain will be, cave walls have straightness 0 and a space ship iron wall should have straightness 3. Fuzziness determines how it blends with surrounding terrains, walls usually have low fuzziness and natural ground terrains have fuzziness 2. Fuzziness 4 should normally not be used as it will be fuzzy with all adjacent terrains, regardless of their fuzziness.
Terrains with black borders (b) should also have fuzziness 1 to get the correct look. The last attributes (bsSn) are not needed for any normal kind of terrains.
From IFG’s workshop page on steam you can subscribe to mods that adds user created content to IFG. Mods that are subscribed will be downloaded automatically after IFG has started from steam and the mods can be enabled or disabled by entering the Mods menu from the main menu.
Subscribed mods will be downloaded in the background, so an extra restart of IFG might be required after the mod has been downloaded.
Anyone can make mods and have them available on the steam workshop, see the Mod Creation chapter for details on how.
Mod can be used to add a collection of icons, terrains and/or random dungeon schemes in a way that is easy to share with other people. Sharing using steam’s workshop can be configured to share with no one, friends or everyone.
Creating a mod is easy as long as you already have the icons (or terrains or random dungeon schemes) you want to include. Start by opening the mod folder by clicking “Mods/Open Mod Folder” from the main menu. There you should download and put the example mod called bwsecrets. It can be found on Illwinter’s web page (http://www.illwinter.com/floorplan). Unzip it so there is a single folder called bwsecrets there that in turn contains illfloormod.txt and a few other files.
This example mod will show you the necessary contents in a mod.
You’ll find the illfloormod.txt among the files. It contains the meta data for the mod, including the mod’s name and description.
You will also find a file called banner.png. It is the image that will be associated with your mod. It must exist and be 128128 or 256256 pixels large png file.
There will also be an icons directory. Create subdirectories in the icons directory and place your icon files there.
Random Dungeon Schemes (.doer) can also be included in the mod, there is one of these files included in the test mod.
You can publish the mod on steam workshop so other users can subscribe to it. To do this go to the Mods menu and right click on your Mod. There will be a button labeled ‘Publish Mod On Steam Workshop’.
After publishing a mod on steam the file illmod_pfid will be created in the mods folder. It contains the steam workshop Id for the mod. Do not delete this file, or you won’t be able to update the mod later on.
There are a number of start options that can be used to control the program before it has started up. This is usually never required, but can be useful for scripting or if the program doesn’t start normally.
General options:
-v     --version           Print version info and exit
-d                         Increase debug level
       --noedgescroll      Don't scroll map when mouse is at the edge of the screen
       --nonumpad          Move with i,o,p,... instead
       --nosteam           Do not connect to steam workshop
       --mapeditor         Start the random map editor
       --importascii=X     Imports an ascii file as a dungeon
       --listascii         Lists all ascii chars that can be used for import
       --export=X          Exports to a PNG file called X and exits
Graphics options:
-u     --fullscreen        Fullscreen mode
       --res=X*Y           Fullscreen resolution
-w     --window            Windowed mode
       --winres=X*Y        Size of window in pixels (default 960*720)
-f     --nofade            Don't use fade effects
       --maxfps=X          Maximum frames per second
       --opacity=N         Alpha in percent for GUI windows (default 90)
       --maxtexsize=X      Limit maximum texture size (maximum width, e.g. 512)
       --noglext           Don't use any OpenGL extensions
       --glfinish          Flush the graphics pipeline each frame
       --disp=N            Use this display device (-1=def., 0=first, 1=second...)
Editor options:
       --nopredraw         Don't predraw squares before they have been fully calculated
       --predraw           Always predraw squares
       --noblurshadows     Don't blur shadows
       --whitewalls        Turns all walls white
       --blackwalls        Turns all walls black
       --walllight=X       Brighten walls next to floor by this amount (default 0)
       --hidelevels        Hide level buttons in floorplan editor
       --gridcoords        Print coordinates for all floor squares
       --sepedgebrush      Seperate terrain selected for edge brush and ordinary brushes
--norememberscale Don't remember the scaling used for iconsIt is possible to create your own rules for random dungeon generation in Illwinter’s Floorplan Generator. To do this click on “Random Dungeon Scheme Editor” on the main menu after starting IFG.
The first thing you need to notice is that you cannot use arrow keys to scroll the map. Hold down the middle mouse button to scroll the map instead, or use ctrl+arrow keys. The arrow keys are used to insert and retrieve rooms from the collection of rooms that you have created. Press ‘?’ to see a list of all keyboard shortcuts, there is no button for most of them so you need to use the shortcuts.
right key    insert current room into collection
left key     pick up room from collection
up key       go one step up in the collection
down key     go one step down in the collection
Once you have completed your random dungeon scheme you have to save it and then start the normal floorplan editor in order to see how it works.
Each random dungeon needs at least one foundation. Every dungeon will start with a foundation and it determines the size and the background of the created dungeon. If there are more than one foundation a random one will be used. To create a foundation, change the rarity attribute to foundation. To change terrain for the background press ctrl+b and choose the new background terrain, this will also clear the foundation. The background terrain will be replaced with room as much as possible, so it is important that the foundation consists of mostly background, otherwise there will not be much space for random stuff.
When you have created and named your foundation or a room, you should put it into the collection. Do this by pressing the right arrow key. You will see it in the collection list on the right side of the screen. Use the left arrow to get a room from the list and the up/down arrows to move the selection up and down.
A random dungeon also needs rooms. The rooms will be used to fill up the dungeon so it becomes something interesting. Rooms will be rotated and mirrored automatically, so there is no need to create rotated versions of the same room. To disable the rotation and mirroring for a room, click the ‘rotation immune’ setting.
Keys determine which room fits with which rooms. E.g. a nbr 2 key will fit together with a nbr 2 key found on another or the same room. Rooms will be rotated and mirrored to increase the chance of finding a room that fits (unless you have set the rotation immune attribute). The foundation must have at least one key for the dungeon generation to start. Press k to insert a key on a square.
Note that you must not place any keys adjacent to each other (diagonally counts too). If two keys are next to each other, they will only match with other pieces that have the same keys next to each other, which might be impossible unless you have designed them to fit that way.
Press alt+h to turn a key into a high priority key. As soon as a room with one or more high priority keys are put in a dungeon, its high priority keys will be resolved immediately. Usually you don’t want these keys, but they can be useful when you have a map part must be filled before the normal dungeon generation continues.
These keys have a few important features. A room cannot have only high priority keys as high priority keys are disregarded when finding a new room to put into the dungeon. Also a high priority key will erase all normal adjacent keys after it has been placed in the dungeon.
Sometimes you want to make sure that nothing is put adjacent to a room, which might result in extra unwanted exits from the room. Press ‘b’ to mark the square as blocked, a red cross will indicate this. You can clear all special attribute on a square including blocked by clicking ‘c’. The blocked square will never be overwritten by anything that is not the background and can be used to make sure that other rooms do not come too close.
There is also a variant that only makes sure that there is free space at the location when the room is initially placed in the dungeon. Press ‘s’ to make reserve space for a square. The reserved space will not have any effect after the room has been placed and can be overwritten by later rooms.
The terrain and cave generating system for IFG originates from the game Conquest of Elysium 4. If you play that game and for some reason manage to find yourself in the lower planes you will probably recognize the cave structures and lava rivers. But usually something went very wrong if you find yourself down there.
The terrain generation felt like a good fit for Illwinter’s next idea, which was a roguelike game. So that game was started and we soon found out that it was a very efficient tool for creating floorplans for our pathfinder campaign. So when the roguelike was abandoned it felt like we shouldn’t let the floorplan part go to waste and IFG was created.